
Linking a custom domain to an Entra ID Tenant
Introduction
In this project, I shall integrate my custom domain, edwarda10.com, into a Microsoft Entra ID tenant within the Azure portal. Custom domain integration is a common task that may be delegated to an IT system administrator who is working with Microsoft Azure. Integrating a custom domain is essential for branding, email services, and user identity.
Project Overview
This project aims to achieve custom domain integration within a Microsoft Entra ID tenant. By default, an Entra ID tenant’s domain will be appended with “.onmicrosoft.com”. By setting up a custom domain, we establish a recognizable identity for our users and our tenant’s branding. This project will showcase skills in DNS management, Azure administration, and identity management through Microsoft Entra ID.
Prerequisites
In order to achieve the goals of this project, we will need the following prerequisite components:
- Domain registrar account – In this case, I will be registering a domain with Namecheap
- Microsoft Azure Tenant – I will utilize an Azure subscription in order to access Entra ID services
- DNS Management Panel – It is imperative that we have authorization to manually access and modify our domain’s DNS records. Some registrars may access this via CPanel. In this case, Namecheap allows us to access the DNS records directly through the dashboard.
Project Guide
Step 1 - Buying & Registering a Domain
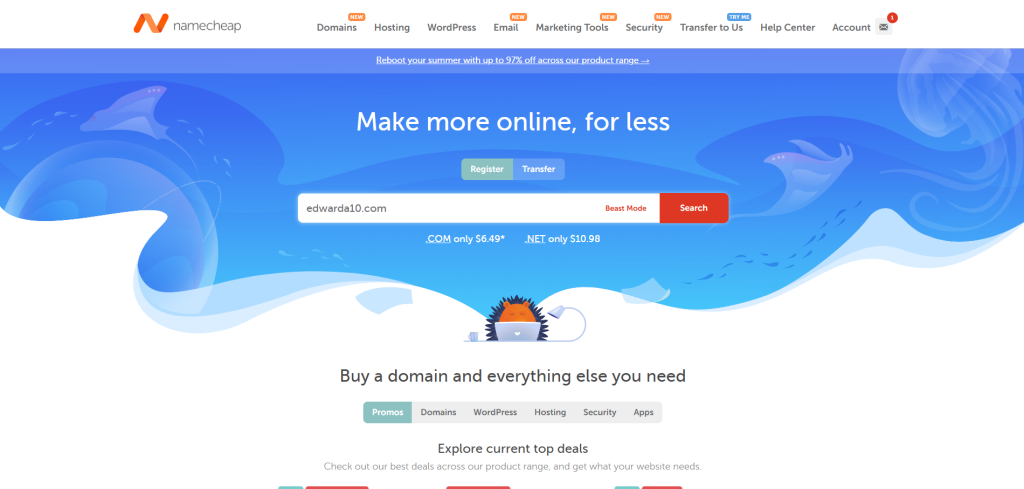
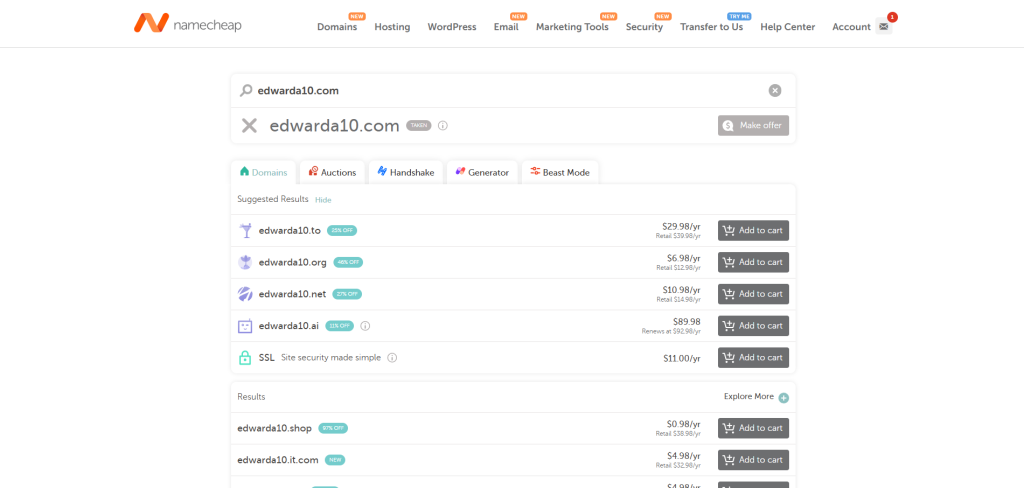
We must first purchase and register a domain with our registrar. Within the scope of this project, I will be registering a domain with Namecheap. On the home page of Namecheap.com, there is a search bar present where we can type the name of a domain and check its registration status. If a domain is available, we will be able to add it to our cart and purchase it; otherwise, the site will show that the domain name has been claimed and is unavailable for purchase. The below images showcase where we can search for domains on Namecheap, and what the search results shall be for my domain, which I had previously purchased.
I previously purchased my domain, so I am unable to provide screenshots of the checkout process. However, when purchasing a domain through Namecheap you will be given the option to purchase additional add-ons to your website. Although this isn’t necessarily within the scope of this project, I feel it is important to say that when first registering a domain with Namecheap, you should add an SSL certificate to your purchase. An SSL certificate enables encrypted communication between your browser and a web server, adding an additional layer of security to your website. In this case, I purchased a PositiveSSL for one year through Namecheap. Now that we’ve registered our domain, we can see it in Namecheap’s product dashboard. In the dashboard’s left-hand column, we will click Domain List. Our domain will be present, as illustrated in the image below.
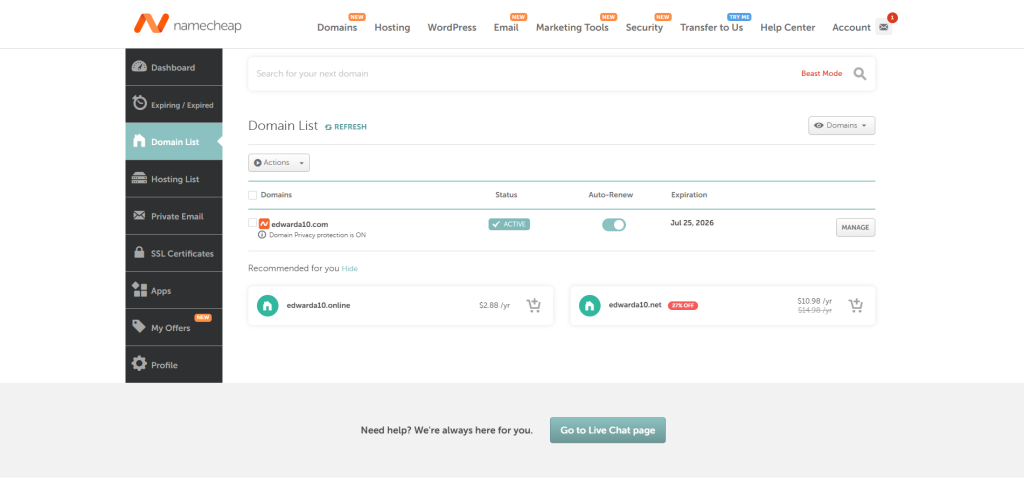
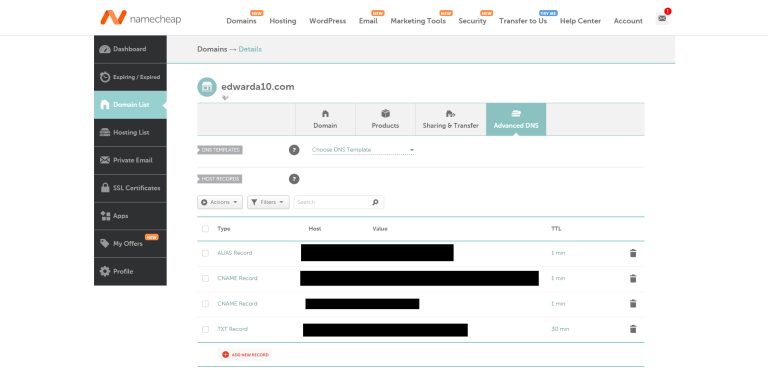
On the right-hand side of our domain, we can click the Manage button and then the Advanced DNS tab to manage our DNS records. It is here where we will be able to modify our DNS records, which is necessary in order to link our domain to our Entra ID tenant.
Step 2 - Access Our Azure Tenant
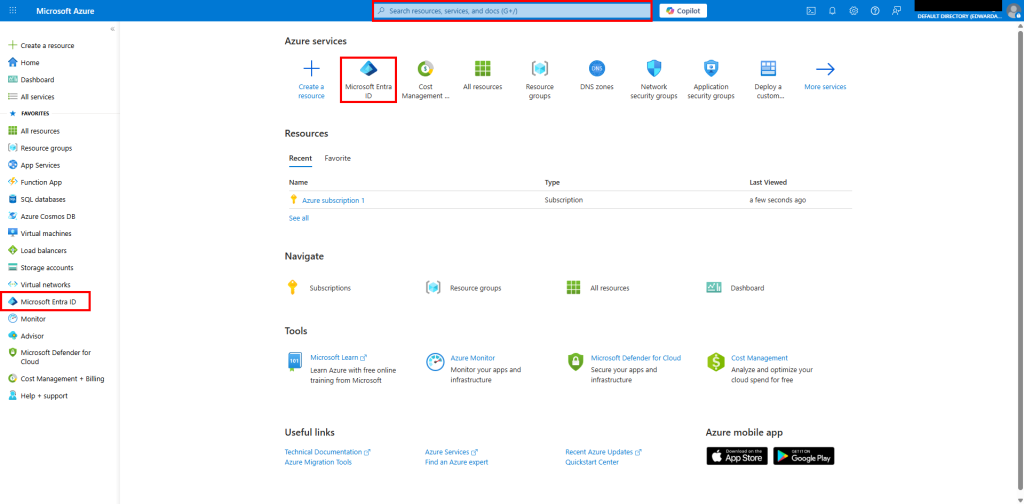
Next, we must access our Azure tenant. I have previously purchased an Azure subscription, so this tutorial will skip the account setup process. We access our tenant by visiting portal.azure.com and logging into our tenant. Once we are logged in, we will be at the home screen of the Azure portal. From here, we will access Microsoft Entra ID. We can either search for it within the search bar at the top of the portal screen, or we can select Microsoft Entra ID from the left-hand column or its icon below Azure services. The image below demonstrates where one can access Microsoft Entra ID from the Azure portal (highlighted by red boxes).
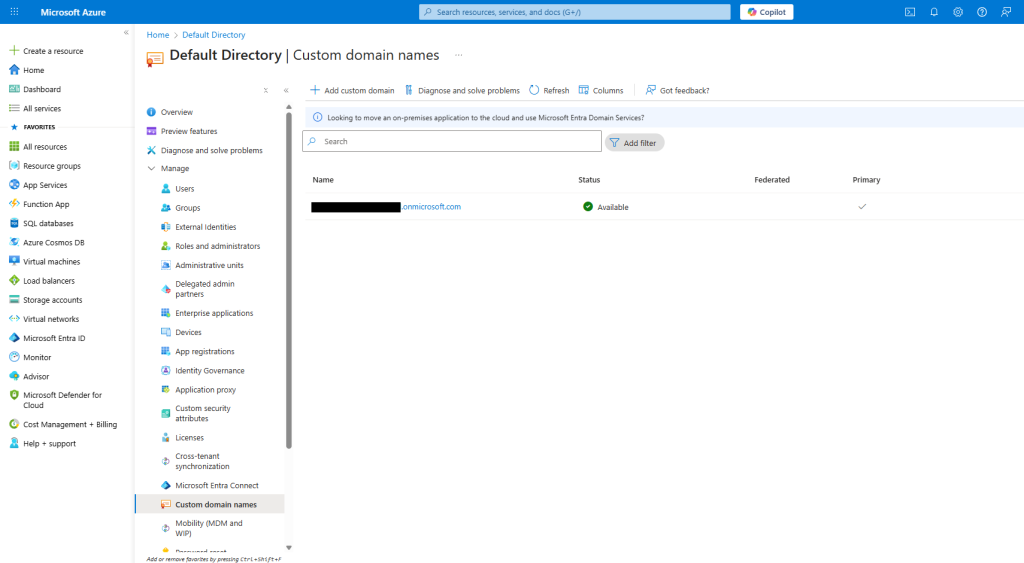
Once we have accessed the overview page in Entra ID, we will click on Custom domain names on the left-hand column. It is here where we can see all aliases that our tenant falls under. In the image below, we can see that the only alias present is the Entra ID default, which is appended with “.onmicrosoft.com.” We shall proceed with adding our custom domain.
Step 3 - Adding a Custom Domain to Entra ID
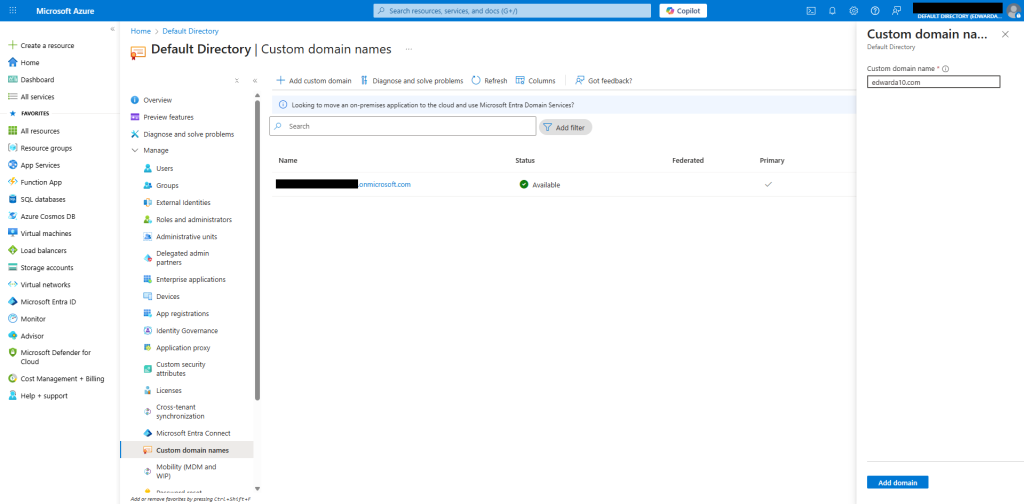
In the custom domain names menu, we can click +Add custom domain at the top of the menu to add our custom domain name. A sidebar menu will open up on the right-hand side; we must enter our custom domain name and then click the blue Add Domain button. The image below showcases the menu that appears in these steps.
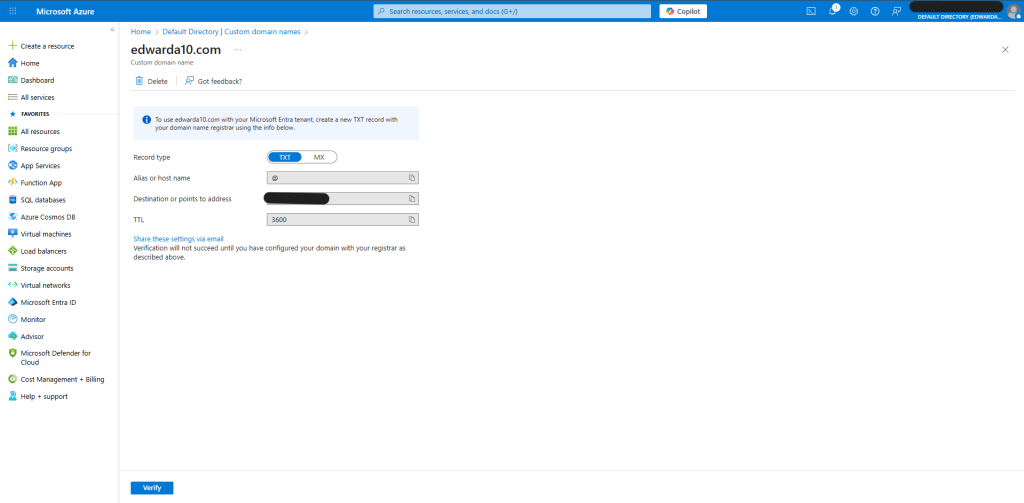
Now that we have added our domain, we will be redirected to a menu where we are given information for one of two types of records to add to our DNS: TXT and MX. For the purposes of this project, we will be utilizing the TXT record, which will be used to verify domain ownership. In the case that we also wanted to utilize email services through our tenant, we would use the MX record. That is beyond the scope of this project, however, so we will only be utilizing the TXT record. The image below showcases the menu with our TXT record information.
Step 4 - Adding DNS Records to Verify Our Domain
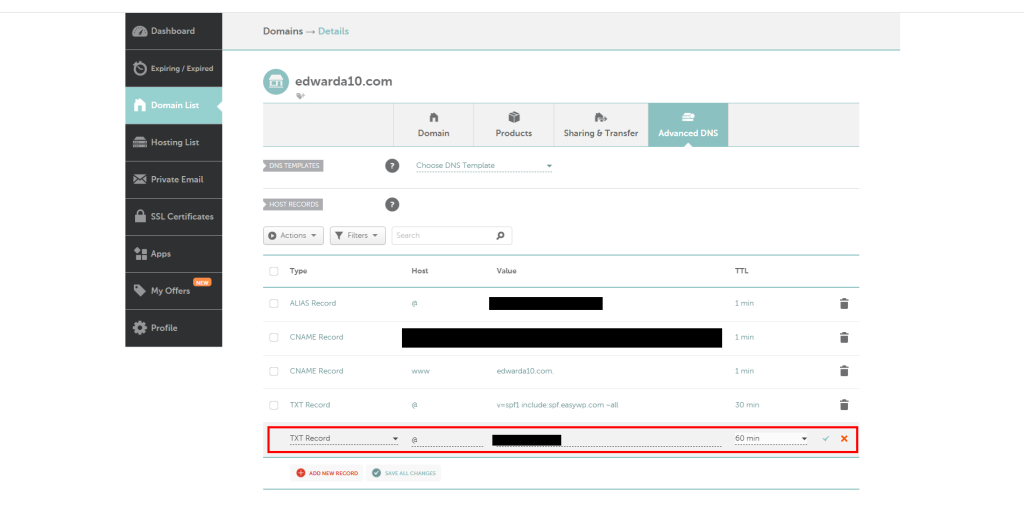
We will need to add this TXT record in our DNS management panel. We will now return to Namecheap to add this TXT record in order to verify domain ownership in Entra ID. From the Namecheap dashboard, we will click on Domain List on the left-hand column and then click the Manage button to the right of the domain we wish to add to our tenant. From here, we will click on Advanced DNS on the top menu bar (you can follow the same steps seen in Step 1 above). We are now in the menu where we can modify our DNS records.
In this menu, we will click on + ADD NEW RECORD seen in red text. Now, we must select TXT record from the options given. From here, we can copy and paste the values from the domain verification menu in Entra ID. It is important to note that the TTL value given to us is represented in seconds. So a TTL of 3600 in Azure will be represented in Namecheap as 1 hour. The image below will demonstrate what this new TXT record should look like in Namecheap.
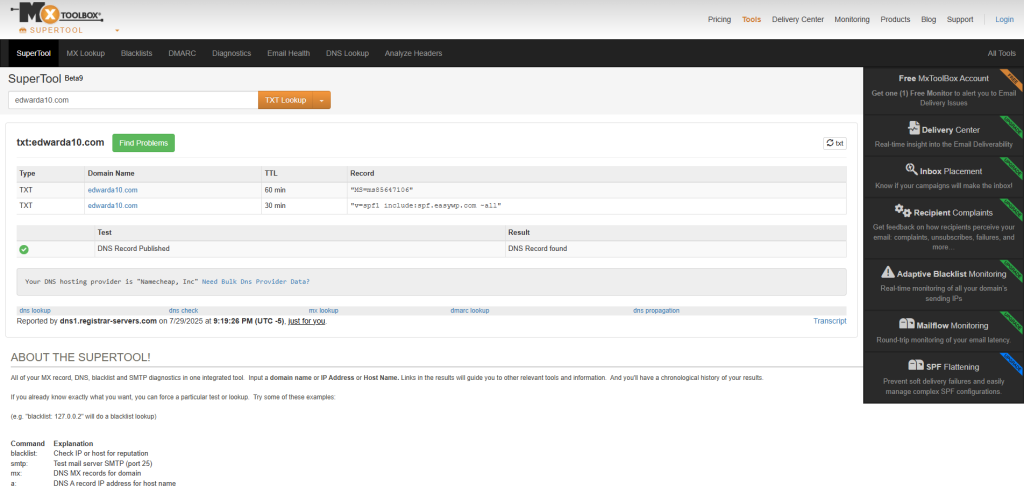
After we have input our TXT record information, we will click the green checkmark symbol to submit and verify the record. Now, we can head back to the custom domain verification tab in the Azure portal and click the blue Verify button. It is important to note that the time it takes for DNS record updates to propagate to the Internet can range from a few seconds to over 48 hours. To troubleshoot and test whether our DNS record has propagated, we can utilize websites such as whatsmydns.net or mxtoolbox.com to look up our domain’s TXT record(s). The screenshot below shows an example of the results on mxtoolbox.com when searching for TXT records for our domain, edwarda10.com.
Step 5 - Verifying Domain Status in Azure and Setting Custom Domain as Primary
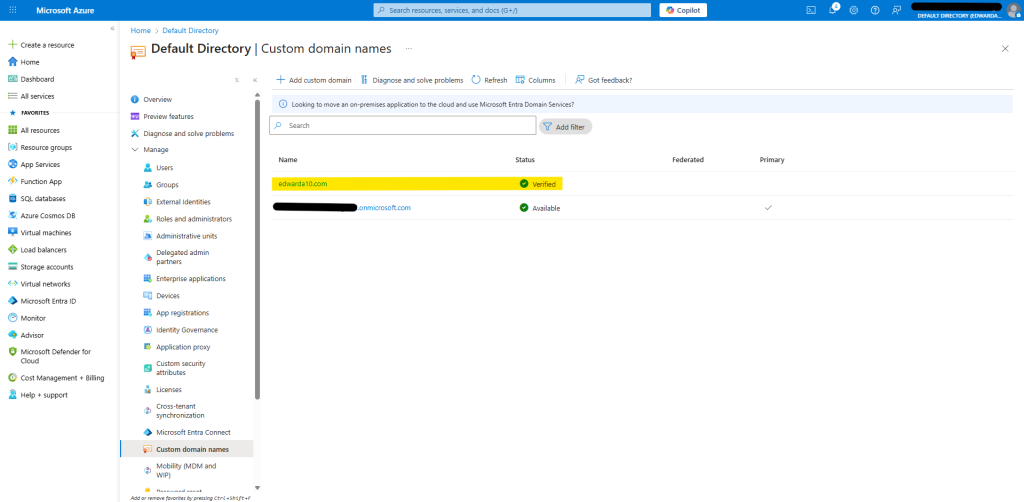
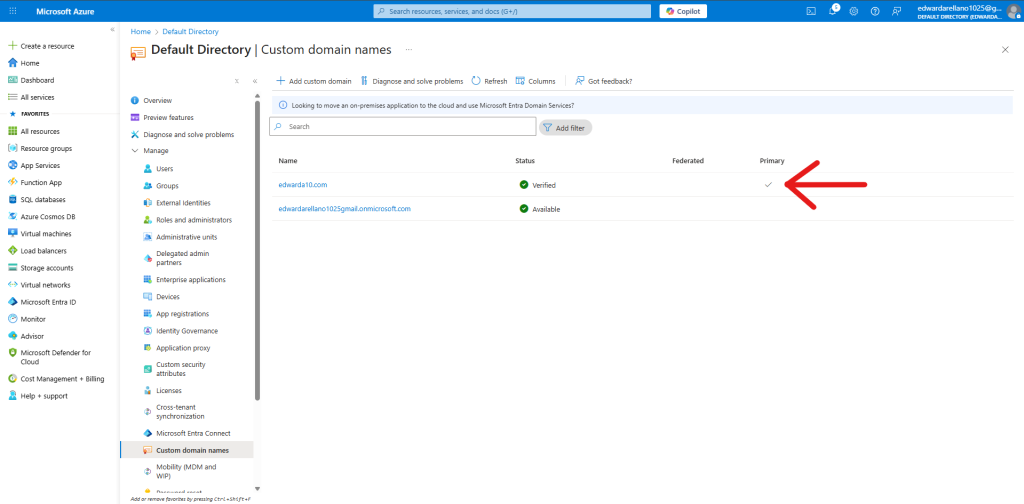
For our next step, we must confirm that the domain has been verified in the Azure portal. If we navigate to Microsoft Entra ID and then custom domain names, we should see our domain listed with a green checkmark labeled Verified. If there is an orange, triangular caution symbol that is labeled Unverified, you must confirm that you added the TXT record to your DNS panel correctly. In this case, please click on the unverified domain name to see the TXT record once more, then repeat the steps seen above. The below screenshot demonstrates what our custom domain names page should look like (our custom domain name is highlighted).
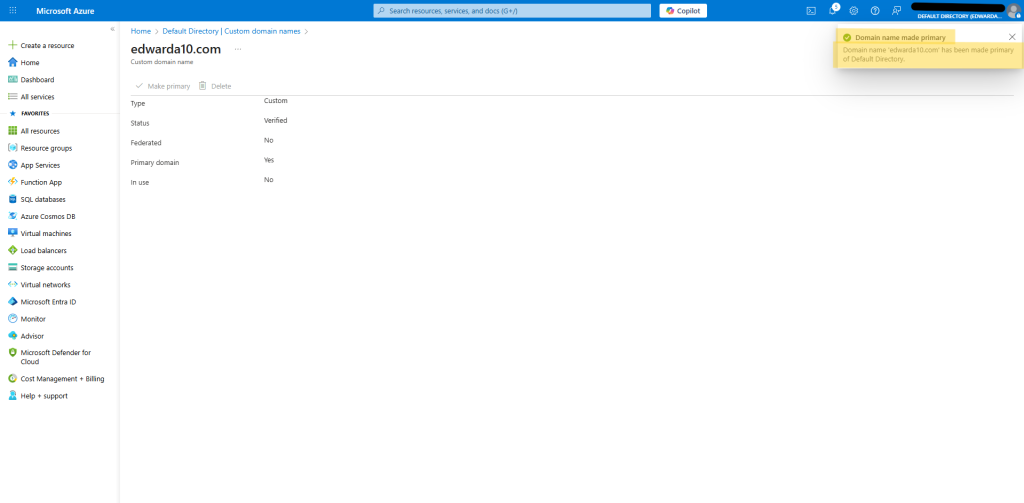
Now we can set this custom domain as our primary. To do so, all we need to do is click on the name of the custom domain (in this case edwarda10.com), then in the page that opens we click the checkmark that says Make primary. The images below showcase the message that appears after setting the domain as primary, and what the custom domain names page will look like after refreshing it.
Step 6 - Creating a Test User with the Primary Domain
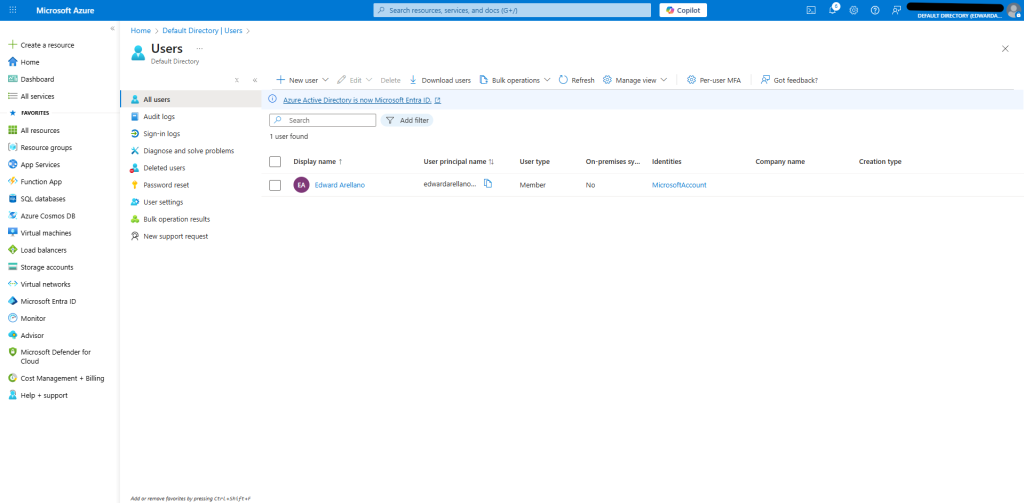
Now that we’ve added a custom domain to our Entra ID tenant, we can put a real-world scenario to the test. As stated previously, one reason for adding a custom domain to a tenant is to establish a recognizable identity not only for your brand and/or company, but for users within the tenant as well. As a result, let’s create a test user using the primary domain, and then attempt to successfully sign in using the newly created credentials. In the Azure portal, let’s navigate to Microsoft Entra ID. Then, under the Manage tab on the left-hand column, let’s click Users. Here we can see our list of users under this tenant. At the moment, I am the only user present, as automatically created when creating an Azure account. The image below showcases what this Users menu looks like.
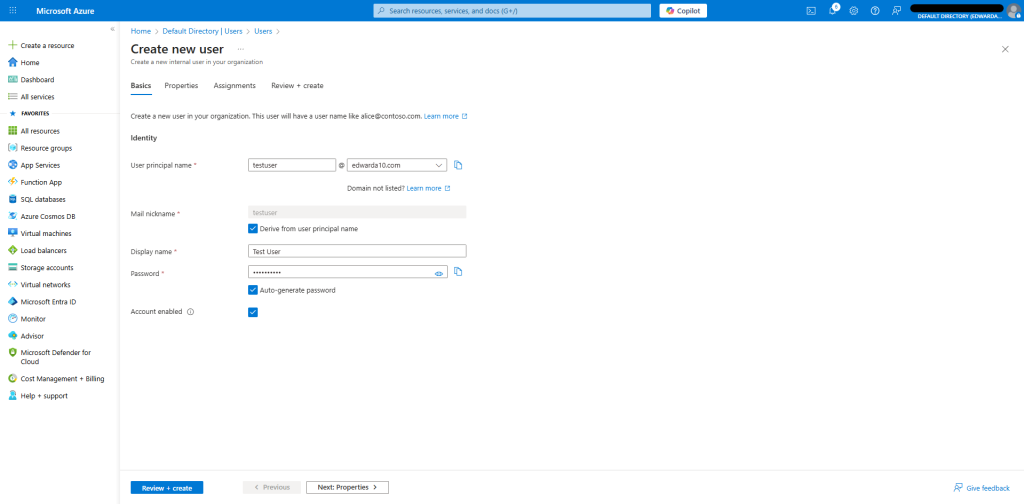
In the Users Menu, let’s navigate to the top menu bar and click the button labeled +New user. In the dropdown menu, let’s select Create new user. Here, we will be met with a menu where we can enter the user’s Identity information. In user principal name, we will enter “testuser”. To the right of this, we can see that our primary domain is already preselected. For Mail nickname, we will check the box labeled “Derive from principal name” and then enter “Test User” next to Display name. For the Password section, we will check the box labeled “Auto-generate password.” It’s important that we copy and paste this auto-generated password on a Notepad entry, as we will need this when we try to log in with this user profile. We must also check the box labeled Account enabled, as this will allow this account to be active for use. The below screenshot demonstrates what this user information should look like after completion.
Next, we will want to enter a first and last name under Identity within the Properties tab. This is good practice so we can identify users created within our tenant. After we have entered this information, we can click the blue button at the bottom of the screen labeled Review + create. Then, we can click the button labeled Create.
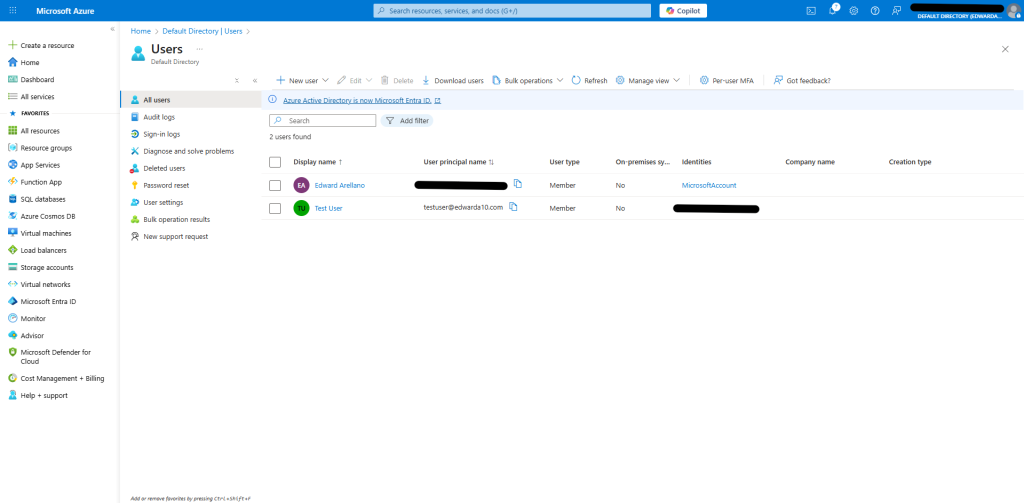
We will then be redirected to the main Users page. If we click on the Refresh button, we should see our newly created test user within the list of users. As can be seen in the image below, the user principal name of our new user contains our custom domain name, @edwarda10.com. Now, we can attempt to sign into the tenant using this user’s credentials.
Step 7 - Signing into Tenant Using New User's Credentials
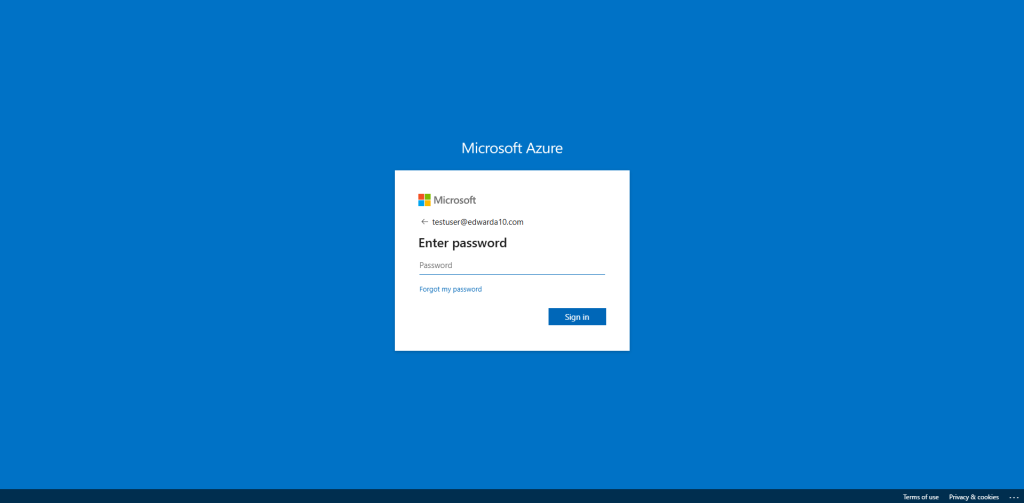
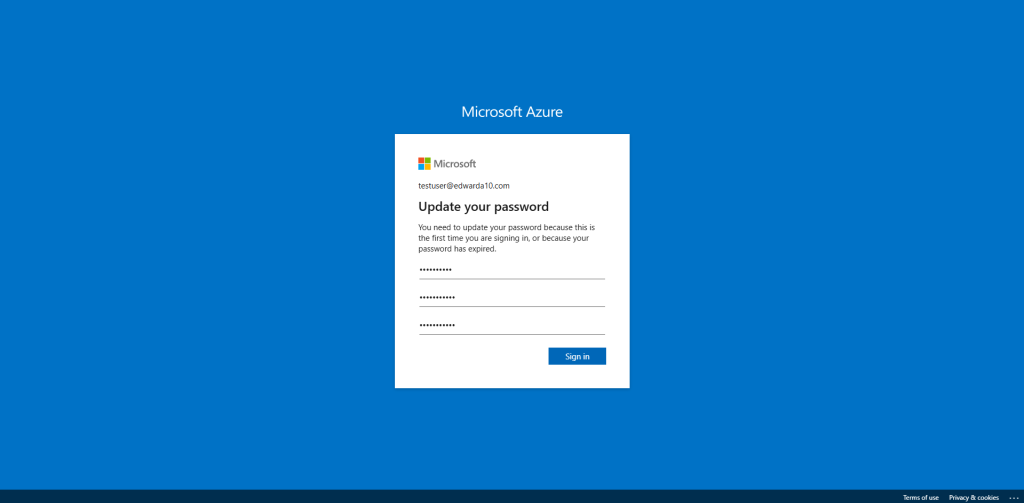
In a new tab, we can sign into our tenant by visiting portal.azure.com and entering our new user’s credentials. The below login screen shows what this looks like. It must also be noted that for first-time login, we will need to change the password of this user’s account.
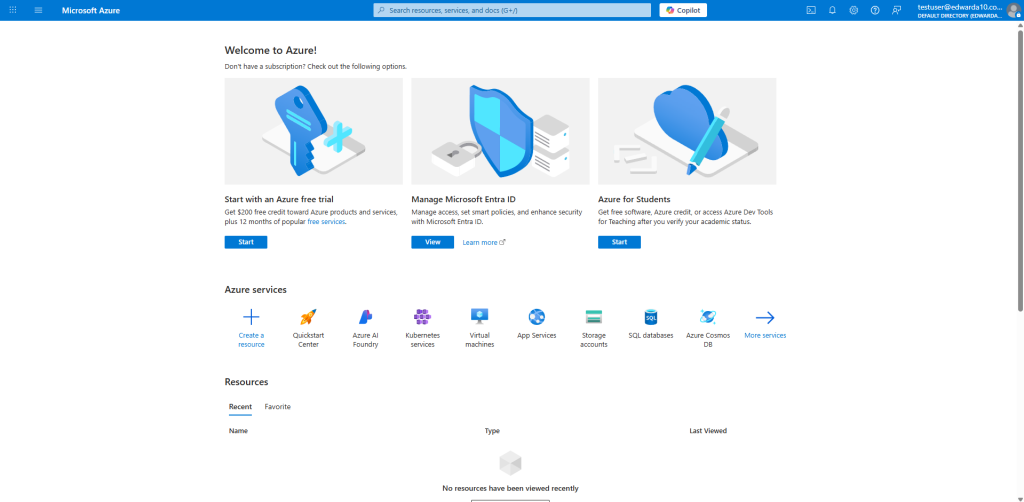
After setting a new password for the user, we successfully log into the Azure portal. As seen in the screenshot below, the test user’s principal display name is seen in the top-right corner with our custom domain name. This shows that we have successfully integrated our custom domain into the Microsoft Entra ID tenant and were able to create and log into a new user account within the tenant using this domain. As a result, we have achieved the goals set for this project and now have a working Entra ID tenant with a custom domain in our Azure portal.
Project Summary
*Insert Text*